Many people are attracted to older analog synthesizers – and in particular modular synths – for their supposed warmth and big sound. However, a lot of Eurorack format modules these days are actually digital, which sometimes can sound a bit sterile or thin. I use a lot of digital sources myself – including modular, keyboard, and virtual synthesizers – and one comment I’ve heard from a couple of my mentors is they felt I should incorporate a good analog mixing board into my workflow to help warm up my sound.
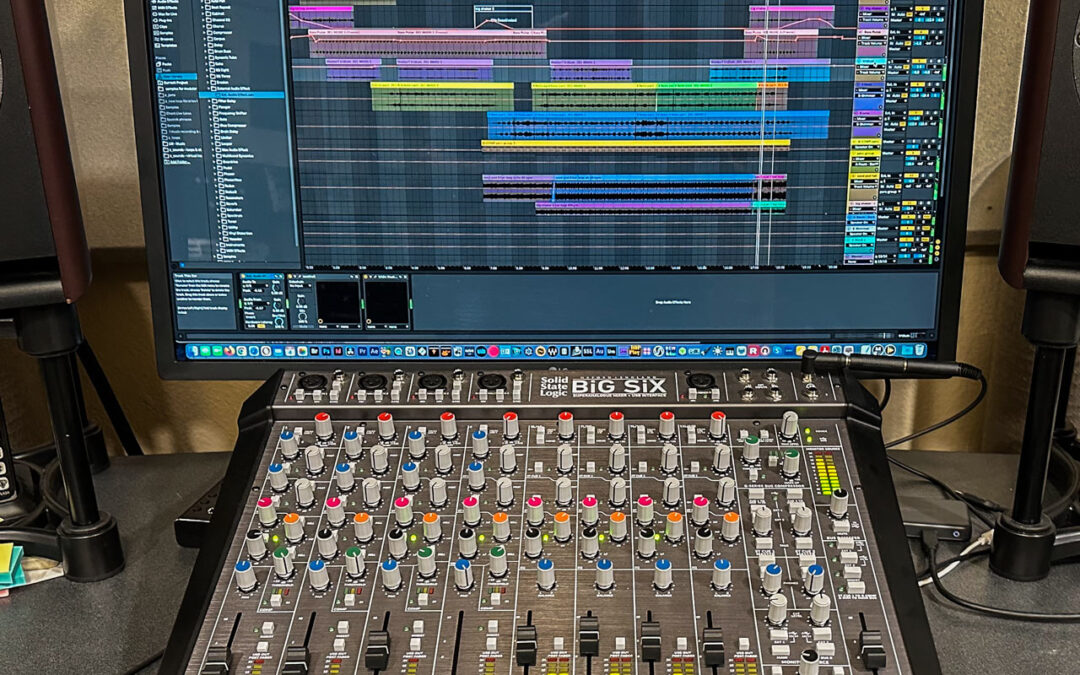
After a bit of research, I settled on an SSL BiG SiX “SuperAnalogue” mixer + USB interface. It can function as a standalone analog mixer complete with mic preamps, and as digital audio interface for your computer with 16 inputs and outputs at 24 bit/96 kHz. It is also known for sounding really good.
Since the computer sees it as just another USB audio interface, it’s easy for me to switch between my studio’s networked audio interfaces and the BiG SiX depending on what task I’m performing. And since the BiG SiX also has a set of high-quality mic preamps and other channel inputs, I can use it to record overdubs after the main session is finished.
What sealed the deal on me on getting a BiG SiX is that every channel has its own dedicated digital input and output. This means I can treat the BiG SiX from inside my DAW as a set of external “analog warmth” effects with EQ and optionally compression, with a one-knob-per-control interface. This is my main application for the BiG SiX, which I will describe in detail below. My personal DAW of choice is Ableton Live, but any DAW that has flexible per-channel I/O routing and in particular an “external effect” plugin will also work.
Configuring the BiG SiX
The first 12 channels of USB input and output are aligned with the 12 analog channels presented on the BiG SiX’s front panel: USB 1 for channel 1, USB 5/6 for stereo pair 5/6, et cetera. By default, their outputs are pre-fader; there is a pushbutton each channel to make it post-fader if you also want to tweak the levels as the signal goes through a channel.
The remaining USB channels 13-16 are assigned to the various External, Cue, and Main channels on the BiG SiX. Combined with flexible Main and Monitor sections, it can take a bit to wrap your head around just how configure them for use in your studio; fortunately, clear labeling on the BiG SiX’s front panel, a generous assortment of enable/disable buttons, and a detailed manual help sort them out.
Here is how I have set it up to work for monitoring my DAW tracks while I work:

First off, the Main output should be reserved for recording a stereo mix back into the DAW – not for monitoring through your speakers. Instead, patch the Monitor outputs to your speakers. The BiG SiX’s Monitor Source section then allows you to audition any combination of the Main mix, the Bus B output for locally “muted” tracks, and its two External inputs, with level controls for the latter. There’s also monitor, mute, and “Dim” (lower the level) switches, as well as an alternate monitor output for comparing two different pairs of speakers.

Those External inputs are the secret to monitoring from your DAW. Pushbuttons located above the Bus Compressor section can assign the External inputs to come from the USB interface on channel pairs 13/14 and 15/16. Inside my DAW, I set its master output to go to USB channel pair 13/14 (External 1), and optionally for the cue channel to go to USB pair 15/16 (External 2). I then enable those as desired in the Monitor Source section.
Additionally, the BiG SiX has a flexible pair of stereo (ST) Cue busses. These are available as effects sends on each of the BiG SiX’s channels (routed to either analog or USB outputs); in a normal effect send/return scenario, you would use these as your send channels, and the External connections as your returns.
However, the Cue channels can do far more than that. There is also a Cue Master section where you can assign External 1 and 2 (as well as a local Talkback microphone input) to also appear on the Cue outputs. These Cue outputs can then be selected for headphone monitoring, as well as for a special trick using the Bus Compressor that I’ll get to in a bit.
What all this means is that by assigning the master output of your DAW to USB stereo pair 13/14, and selecting that to be External 1’s input, you can now monitor your DAW through both headphones and/or the Monitor outputs with separate levels, without affecting the Main level for re-recording a mix back into your DAW.
Can You Really Hear a Difference?
I am currently in the process of mixing and overdubbing a number of already-recorded songs for my next few albums. The reason I got the BiG SiX was to see if it could improve the sound of these tracks that I’ve already recorded.
I tested this idea by using Ableton’s External Effects plugin to send an Ableton track to a BiG SiX channel over USB, and then back to Ableton. I disabled the EQ and compressor on the BiG SiX’s channel strip, and made sure it was set for unity gain (it is worth reading SSL’s manual about how different panning settings in particular can change the level). I poised my mouse over the enable/disable button for the External Effect plugin, closed my eyes, and clicked it rapidly a number of times so I would no longer know if it was enabled or disabled.
Then, with my eyes still closed, I clicked and listened until I was sure I preferred one setting over another. The difference was very subtle, but every single time – with different source material – I picked the sound with External Effect enabled, looping through the BiG SiX: it sounded slightly “fatter” with a hint of an extra dimension. This convinced me it was worth processing my tracks through it while mixing.
Dividing Up the Channels

The BiG SiX has four mono channels with their surprisingly useful one-knob compressor, plus four stereo pair channels. All have a very transparent 3-band EQ that is best for subtle “shading” treatments (I use plugins when I need more obvious or surgical adjustments); the EQ on the mono channels are slightly more flexible. There is also a master Bus Compressor borrowed from the “G” series of consoles; this is normally applied to the stereo Main mix – but there is a trick where you can split it out as its own stereo channel.
The temptation is to just assign your mono tracks to the mono channels on the BiG SiX, and the stereo tracks to the stereo channels. However, since the mono channels are more powerful, think first about which tracks in your DAW need the most help – and in particular, which ones would benefit from a bit of compression (such as the bass or vocal tracks). If a track that would like some extra help such as compression is stereo, then route it to two adjacent mono channels on the BiG SiX (such as 1 and 2), and set the controls for those channels identically, panned hard left and right. If you have a mono track that doesn’t need compression and either no EQ or the same EQ as another mono track, treat a “stereo” channel in the BiG SiX (such as USB 5 and 6) as two individual mono channels with ganged controls.
Bus Compressor Trick
I combine my percussion tracks in my DAW into their own subgroup. This allows me to process them together, to help make them sound like they were played together in the same virtual “room.” Compression is one way to achieve this – and the BiG SiX has a nice Main bus compressor built in. How can we steal this “overall” compressor to use just on our percussion submix?
There is a button above the BiG SiX’s Main fader labeled “ST Cue 1 to G Comp & Sum to Main Bus.” That means instead of sending the entire stereo mix to the G-Series Bus Compressor, you can send just what has been assigned to Cue 1. In the ST Cue 1 Master section, there is a button to assign either Ext 1 or Ext 2 to Cue 1; above the Bus Compressor section there are two more buttons to have USB channels 13/14 or 15/16 sent to Ext 1 and 2 respectively.

What this means is I can apply another instance of the External Effect plugin in Ableton (or the equivalent in your DAW) for my percussion subgroup, and send it to USB channels 15/16. On the BiG SiX, I enable Ext 2 from USB 15/16.
Next, I enable Ext 2 in the ST Cue 1 Master Section, and set its Level control to 0 dB (unity gain), while making sure all of the individual channel controls for Cue 1 are set fully counter-clockwise (off).

Finally, I enable the pushbutton for ST Cue 1 to G Comp & Sum to Main Bus, and set the Main fader to 0dB. The Main output appears on USB channels 15/16, which I select as the return channels in the External Effect plugin for the subgroup. Make sure all of your other individual channel faders are all the way down to keep them out of the Main mix, and now you’ve isolated the G-Series Bus Compressor to work on just the USB 15/16 channel pair.
Re-Recording Individual Tracks
If you are the type of person who works on one song until it is finished, you can leave your DAW and the BiG SiX set up this way, and continue working on editing and mixing in your DAW, with EQ and compression tweaks on the BiG SiX. When you render the final mix, the individual tracks will go through the BiG SiX while it renders.
Personally, I like to put off committing to a mix until the very last moment; I also like to move between different songs while I’m working on an album. Therefore, when I feel like I’ve settled on the BiG SiX’s EQ and compression settings, but might still want to tweak the overall mix and plugins in my DAW later, I re-record the DAW tracks processed through the BiG SiX back into my DAW. This approach also allows me to process more tracks than the BiG SiX can physically handle in one pass.
The simplest way to do this is in Ableton is to use its Freeze feature where it renders an individual track to audio including all of the plugins assigned to it – including the contribution of the BiG SiX through the External Effect plugin. If you un-Freeze a track, you will revert back to your original source files, going through the External Effect to the BiG SiX. In Ableton you can also Flatten a track make that recording permanent.
For more flexibility, I use a different approach. First, I duplicate the tracks that are going through the BiG SiX. I keep any virtual instruments plus the External Effect on the original version of the track, and any other audio processing plugins on the duplicate.

I then assign the duplicate track’s input source to record from the original track, post-FX to capture the BiG SiX through the External Effect, but pre-mixer meaning it will be at full volume without automated fades. The duplicated track also received a copy of my mix automation moves, so I can continue to tweak the mix for the newly-recorded duplicate. After recording, I then mute the original tracks, and continue working with the duplicate, which contains the BiG SiX processed audio as its source.
As I hinted above, many of my projects have more tracks than the BiG SiX can process in one pass. No problem; once I’ve re-recorded one set of tracks, I can set up the next set of tracks and then process those separately.
Recording a Final Stereo Mix
Of course, you can also record your final mix through the BiG SiX, in essence using it as an “analog summing mixer” in addition to taking advantage of its EQ and compressors per channel strip, and the overall G-Series Bus Compressor to “glue” together the entire mix.
The overall procedure is mostly the same as above: just assign your DAW tracks to BiG SiX channels over USB, and then record the BiG SiX’s Main stereo mix back into your DAW from USB channels 15 and 16. In this case, you will be using the faders on the BiG SiX to tweak the mix; bring up the faders to 0 dB initially and adjust from there.
If you have more tracks than BiG SiX channel strips, there are a few ways to eek more channels out of the BiG SiX. The simplest is create subgroups or submixes in your DAW for tracks that need similar processing, and then assign those subgroups to BiG SiX channel strips.

If you have tracks or subgroups that’s don’t require additional analog EQ or compression – such as effects returns – you can route them in your DAW to go through USB channel pairs 13/14 and 15/16. Use the buttons above the Bus Compressor to have the BiG SiX to take Ext 1 and Ext 2’s sources from USB instead of the analog connections on the back, and then enable the Ext 1 and Ext 2 buttons above the Main fader to include them in the final mix.
As an alternative to using subgroups, you should also be able to assign different tracks in your DAW to be sent to the same USB channels, where they will be submixed inside the DAW and then share channel strips on the BiG SiX – just keep an ear out for clipping on the digital side if you combine too many sources playing loudly at the same time. This works best if you combine DAW tracks that are playing at different points in your timeline; you can even adjust the settings on the BiG SiX in between the appearance of different sources on that channel strip. (In these days where we are used to our DAWs automating everything, it may seem odd to do manual, real-time mixing on a physical mixing board, but remember that before automation, this is how all songs were mixed!)
Permanent Home
As an independent musician with a home studio, I never imagined I would be an “SSL owner.” However, the BiG SiX now lives on my main desk between my computer monitor and keyboard. It has become my most-used hardware effects processor, plus it provides a flexible way to control my headphones and studio monitors. Its analog inputs also mean I can also record with it when I don’t feel like employing the large networked audio interface system I have set in the rest of my studio. It’s been one of my best purchases.
THANK YOU. I can’t tell you how many times I’ve tried to figure out simple things on the BiG SiX that have had me scratching my head. Simple, easy to follow. Again, thank you.
I’m really happy I could be of help – thanks for letting me know! (And FWIW, I refer back to the same article myself just to remind me when I haven’t done something in awhile, like isolating the bus compressor for processing).
Thanks man! I recently got one too, and I’m in the process of learning how to use it properly. I surely will come Back and read the articule until I get All the hints you had written.
Thanks for this, Chris. Coming out of the Eurorack and into the Big Six, are you just using 3.5 —> 1/4 cables for every module’s output? If so…is that annoying?
The short answer is: I use output modules that convert the Eurorack level signal to balanced +4 audio, and use balanced audio cables to connect to the mixer or DAW.
The longer answer is: I use output modules to convert the modular signal to +4 balanced signals, and patch that into my Focusrite Red or MotU audio interfaces. Those are connected to Ableton Live, where I do all of my recording. When it comes time to do editing and mixing, I switch Live to use the BiG SiX as its audio interface.
This has been really insightful. Do you have a recommendation for a workaround using the desk purely analogue? I’m tracking through an rme sound card and would be keen to hear your thoughts on how it could be done. Thanks again
Apologies for the slow reply – it’s been a crazy month. The mixer has a full compliment of analog inputs; you can use it standalone without a computer, or use it as your main analog to digital converter.
Thank you so much for this.
If I wanted to keep my guitar hooked up to ch 1, is it easy to then use this to hook my pedals to in an efx loop type of thing but then the source is what I recorded in the DAW?
If track 1 is dry guitar, and assuming I can use my pedals as outboard gear, where does it record the effected signal to?
And if I wanted to use this to then also run outboard gear for mastering (from a stereo wav, but wanting the mix bus comp), is the process the same?
Yes, you can definitely use outboard gear with it. The confusing bit is that they use the word “cue” for “effects” send and returns. Get over that, and it’s very similar to a traditional analog mixer with effects sends or loops.
This is an excellent rundown and definitely the way I would use this mixer, to run stems through!
If you fancy doing a video tutorial I’m here for it. Cheers!
What a beautiful human you are to take the time to help us linear brains that need a road map from A to B to get anywhere. It is so nice of you to spell all this out.
Just want to ask, have you set up your other audio interfaces output to the Big Six? I have an Apollo x8p and track some instruments with that interface and it is also my main audio interface. I changed my workflow from sending it via USB to the Big Six USB Audio Channel; I use Live now to send i.e. Line In 1 from Apollo via Apollos Analog Line Out 1 to the Analog Line Input of Channel 1 on the Big Six. Some Instruments and the Main Out of my Analog Rytm are feed directly into the Audio Channels from the Big Six, so nothing is going over USB Audio anymore. I also could send everything into the Analog Line Outputs from the Apollo which are connectet to the „Sum Input to Main“.
The BiG SiX can certainly be treated just as an analog mixer, and I bet many do just that. In my case, I do not run from another interface through the BiG SiX; the computer always feeds it, and it either goes back into the computer over USB or out to the same monitor speakers shared by the Audient ORIA. I have an audio patchbay for the speakers where I can decide which interface is feeding which speakers.
I was using it the same way like you before but then I realized that the EQs are working different between audio channels and USB audio channels:
„The Solid State Logic (SSL) Big Six combines a high-quality analog mixer with a 16-in/16-out USB audio interface, while USB audio channels refer to the digital audio transmission method using a USB connection. The Big Six’s audio channels are part of its analog console design, offering features like mic preamps, EQs, and faders, while USB audio channels handle the digital transfer of audio data between the Big Six and a computer. The Big Six’s 3-band EQ is based on the SSL E Series console, providing control over low, mid, and high frequencies, whereas “EQ” in the context of USB audio channels refers to the digital equalization process within a Digital Audio Workstation (DAW).“
Where is that quote from? It is written in a slightly confusing way. The analog EQ on the BiG SiX’s channels do indeed affect the audio being sent to and from a channel over USB. I really don’t think there is a separate digital mixer or EQ hiding in there, sharing the same knobs…