The thought process behind putting together a basic system that covers a wide range of synthesis techniques.
When I decided to create the Learning Modular Synthesis course, I didn’t want to use a large, potentially intimidating or confusing system – so I set the challenge for myself to create a compact yet comprehensive system that could be used for every aspect of the course, and that would make sense for a beginner to aspire to. Although I might have different goals for this system than you for yours, the decision process I went through may be interesting for those who are planning out their first systems.
Before I started, I created a set of criteria that every choice had to answer to:
- Choose a core set of modules that would be commonly available and easy for a beginner to buy, that are sufficient to create at least one full, interesting-sounding monophonic voice. (Creating more voices at the same time requires multiples of modules; as it turns out, this system can create two or more voices at a push.) I chose the Eurorack format given the sheer variety of modules available in both assembled and kit form.
- Base the core on a typical “East Coast” (or Far East) synth voice, as most self-contained keyboard synths use this configuration, and therefore a beginner may feel more at home with this starting point.
- Expand that core to encompass typical “West Coast” synthesis techniques, as well as filling other obvious holes to create a wide variety of sounds.
- Make sure it could accommodate the most common ways of getting notes in, as well as getting sound out. I also included the capability of processing external sounds such as drum loops.
- Minimize the case expense by going with a 19” rack mount rails-and-ears arrangement. I decided to keep it to 6U (two rows of Eurorack modules) – a modest-sized rack case, or a reasonable amount of spare room to free up in an existing studio rack. A 19” rack is 84 “hp” (horizontal pitch: the units used to define the width of a Eurorack module, with 1 hp = 0.2”), so everything had to fit into 168 hp. And with a 19” rack system, it’s fairly easy to add more rows as long as you have more room in your rack.
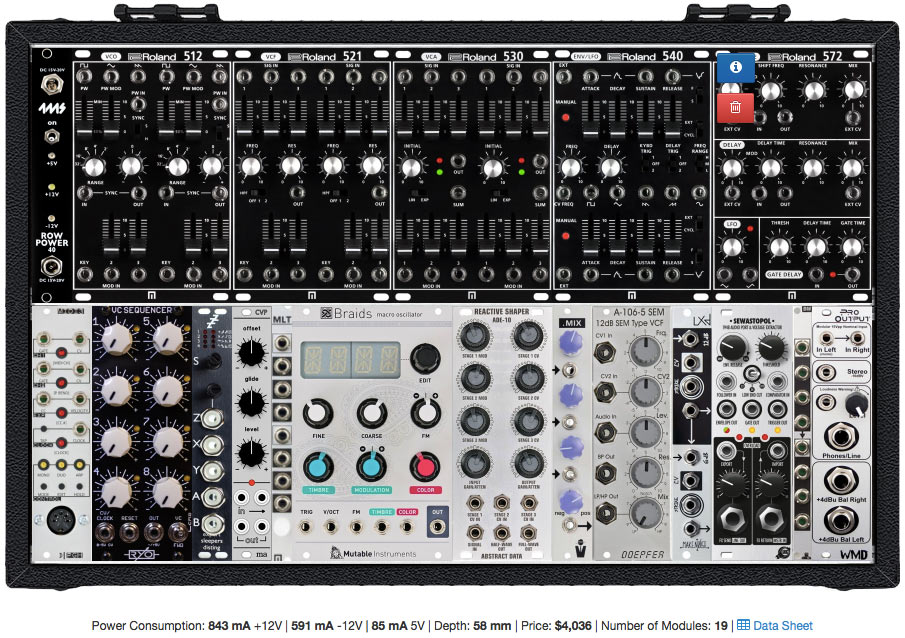
The final system – with links to descriptions of each of the modules – is listed on ModularGrid. Below I’ll explain my thinking behind the choice of each module. But first, let’s deal with an issue around how many define their desired approach to synthesis (if this is already familiar ground, jump ahead to The Core East Coast Modules).
East Coast versus West Coast
Those new to the modular synth world may wonder what all this talk of “east” and “west” is about. In overly simplified terms, the early synth manufacturers on the east coast such as Moog and Arp tended to take a different approach to a typical synth voice than those on the west coast such as Buchla and Serge. Japanese companies such as Roland, Korg, and Yamaha tended to follow the so-called “East Coast” approach.
Classic East Coast synths usually have 1-4 voltage controlled oscillators (VCOs) connected in parallel, tuned to intervals or slightly detuned in unison, with harmonically rich waveforms such as the sawtooth and square. This mass of harmonics are then fed into a voltage controlled filter (VCF) that selectively removes some of them to shape the tone of the sound. The most common filter type is a low pass filter (LPF), which filters out the higher harmonics. This result is then fed into a voltage controlled amplifier (VCA) to shape the dynamic envelope of the sound. East Coast synths are usually played with a standard black-and-white keyboard, as well as sequencers (common to both schools of synthesis).
By contrast, the West Coast approach often involves starting with VCOs that have less harmonically complex waveforms, such as the triangle and sine. To shape the tone of the sound, techniques are used to add harmonics to this starting point, rather than subtract them. This includes frequency modulation (FM), where one oscillator is connected to another in series (not in parallel, as is the East Coast approach) to vary its pitch at audio rates, creating new sets of harmonics as well as potentially inharmonic sidebands. They also feature waveshapers, where a simple waveform is distorted to create more harmonically complex waves – the opposite action of a filter. These newly-created harmonics are then fed into a VCA which may have a filter attached (known together as a low pass gate or LPG) to remove harmonics as the sound grows quieter, mimicking the way natural sounds often behave. Controllers tend to be more abstract, such as a collection of programmable touch pads rather than a standard keyboard.
In both systems, envelope or “slope” generators (EGs) as well as low-frequency oscillators (LFOs) are used to modulate the filter cutoff and amplifier loudness, in addition to other parameters such as the depth of waveshaping or the width of the pulse in a normally square wave (this is known as PWM or pulse width modulation). You’ll want at least one EG and LFO to get started; the more modulation sources you have, the more richly detailed and nuanced of a sound you can create. Another common modulation source is a sample & hold (S/H), which measures at input voltage on demand, and outputs just that voltage until you ask for a new measurement (sample). When the input source is a noise generator, the result is a random output.
Of course, these are not rules that were strictly adhered to: For example, East Coast synths often have frequency as well as amplitude modulation capabilities; West Coast synths often have filters. And although East Coast synthesists were often associated with more traditional, melodic music and West Coast synthesists were associated with the avant garde (think Wendy Carlos with her Moog versus Morton Subotnick with his Buchla), again, you can create virtually any type of sounds and music with either approach.
The Core East Coast Modules
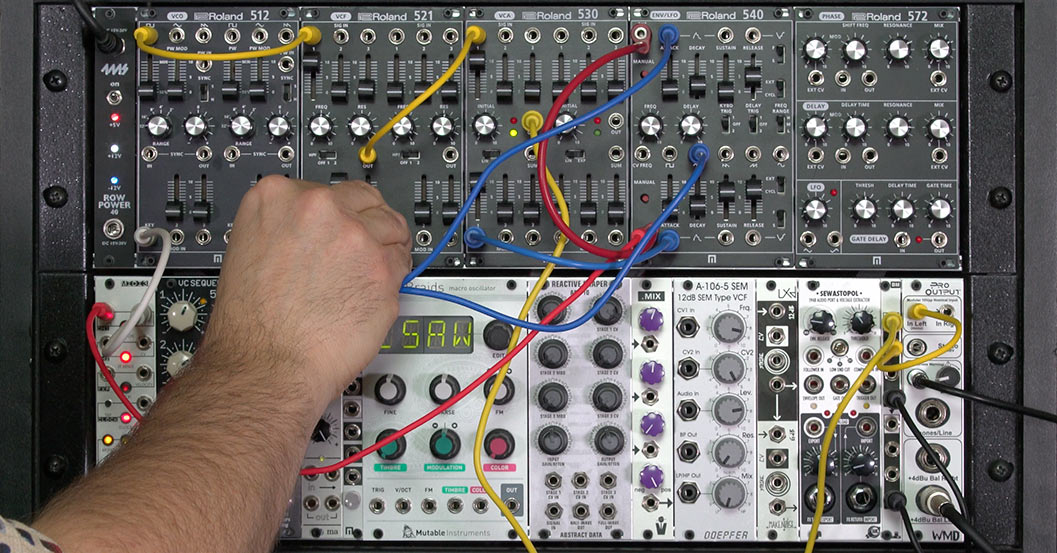
For the backbone of my East Coast style subtractive synthesizer voice, I went with the Roland 500 series analog modules: the 512 Dual VCO which supports oscillator sync and PWM; the 521 Dual VCF with fully variable low pass filters plus a switchable high pass; the 530 Dual VCA with offset controls to pass a signal even when not being modulated (good for checking out progress while building a patch); the 540 Dual ADSR (attack/decay/sustain/release EG) + LFO; the 572 effects unit which includes a phase shifter, an analog audio delay, a gate (note on/off) delay, and a spare LFO borrowed from the phase shifter.
It’s possible to replicate this module line-up using other manufacturers, and some all-in-one semi-modular synthesizer voices come close, but there are a few reason I selected the Roland 500s aside from their coverage of the core functions and wide availability:
- All of the main modules being “dual” (two identical units in one module) meant it would be easy to create two simple or one complex East Coast synth voice.
- The VCOs, VCFs, and VCAs all have control voltage input mixers. This makes it easy to combine multiple signals such as the pitch voltage from a keyboard, the rising and falling voltage from an envelope generator, the repeating voltage from an LFO, or even the audio-rate output of one of the oscillators without requiring external control voltage mixers or attenuators.
- The VCFs and VCAs have multiple audio inputs with level controls, making it easy to combine multiple oscillators, waveforms, and even filter outputs without the need for an external mixer or attenuator.
- They were based on classic analog synth designs, so again it would be easy for both experienced and new users to relate to their functions.
This video from the course demonstrates how to patch a typical East Coast synthesis voice using these modules. I also added a few modules to expand upon what the Roland 500 series could do, including:
A Doepfer A-106-5 SEM filter, as it has a very different sound than the Roland 521. The Doepfer is a 2-pole filter with a shallower slope (12 decibel/octave) compared to the 521’s 4 poles (24dB/oct), and is “multi-mode” in that it supports multiple filter shapes including low pass, high pass, bandpass, and notch.
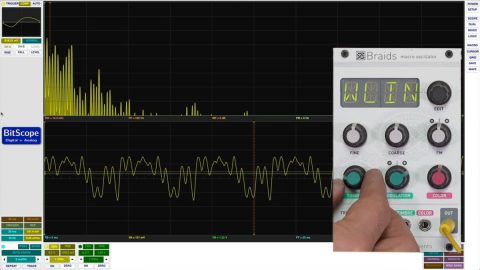
- A Mutable Instruments Braids digital oscillator, which supports a couple of variations on digital wavetable oscillators in addition to numerous other synthesis techniques. In general, I think a digital oscillator provides a nice contrast and addition to analog oscillators in that they provide a wider variety of harmonic combinations that still fit the East Coast model of filtering them to create timbral variation.
Extending to the West Coast and Beyond
As noted earlier, a typical West Coast approach is to start with a more harmonically simple waveform such as a sine or triangle wave, and then modifies that wave to add harmonics. While the Roland 512 oscillators do feature triangle waves, the highly flexible MI Braids and Expert Sleepers Disting offer sine waves as well as triangles – and in the case of the Braids, variations on those.
As suggested earlier, one way to create new harmonics is to modify the frequency or amplitude of one oscillator’s waveform using a second oscillator also running at an audio frequency. The Roland 512 VCOs – like most VCOs you will find – support exponential frequency modulation, but that approach tends to be bit harder to control as the pitch can shift when you alter or envelope a parameter such as the depth of modulation. An easier-to-control variation is linear frequency modulation, which not all oscillators support, but which is more user-friendly. One of the Disting’s modes is a very nice linear FM oscillator that also supports through zero modulation (the frequency can go negative, flipping the waveform backwards); the Braids can also act as its own FM complex oscillator.
Another approach that re-arranges the tuning of the harmonics present is often called ring modulation (also known as balanced modulation). This is where one oscillator quickly varies the loudness (amplitude) of another. One of the modes in the Expert Sleepers Disting is a “four quadrant multiplier” which acts as a ring modulator. These are often used to create clangorous, atonal sounds such as bells.
(By the way, when you’re using two independent oscillators to create an FM or AM patch, you usually want a VCA between them so you can envelope or otherwise vary the modulation depth; this is one of the times when the extra VCA in the Roland 530 comes in handy – make sure you eventually have more than one VCA in your system.)
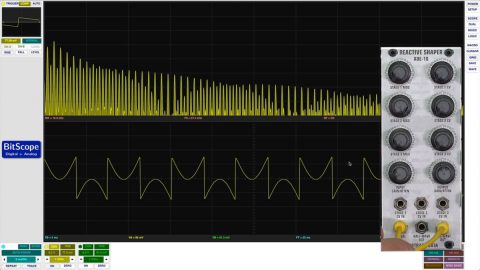
Just as not all filters sound the same, neither do all waveshapers, ring modulators, or other waveform modifiers – their circuits are often chosen and hand-tuned by their creators to fulfill their own personal aesthetic rather than technical goals. (For example, the new AJH Synth waveshaper and ring modulator – which I acquired after I finished recording this course – have their own sound; I own others as well.) Decide what general functions you’d like to try, then listen to demos of individual modules to hear which approach appeals to your own ears.
As noted earlier, West Coast systems do not avoid filters altogether; indeed, a low pass filter is often paired up with the VCA to form a “low pass gate” that causes the sound to grow duller as it fades away. To cover this function, I included a Make Noise LxD in this system as it’s small, inexpensive, easy to use, includes two variations on the theme inside one module, and sounds very good – indeed, I created a pair of separate videos on it.
There are other types of modules than the ones mentioned above – including effects, dedicated percussion sound generators, noise sources (another function of the Disting, along with a S/H), resonators, slew generators (for portamento and other glide effects), sound modeling simulators, and more – but this collection will cover a large amount of territory. If you have more specialized goals and tastes, you may need to do a bit more research before you open your wallet.
Playing Notes
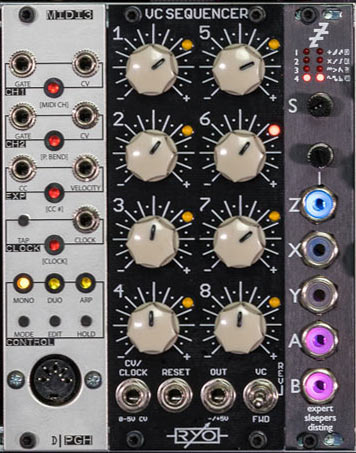
It is also common for a modular synth to have its own “sequencer” – a module that can produce a pattern of voltages and gates – and therefore, notes or other voltages that can be used a modulation source – in sequence. I used the compact RYO VC (Voltage Controlled) Sequencer, which can also be built from a kit if you want to save some money when assembling your modular system. As is the case with many sequencers, it does not have its own clock built in to set the tempo; that can come from an LFO or another timing-related module such as the clock section of the Pittsburgh MIDI 3. The VC Sequencer contains eight “stages” or “steps” each with its own knob; these knobs are continuously variable. If you’re trying to dial in exact notes, it’s often easier to feed a sequencer through a “quantizer” module that will auto-correct the voltage set by each knob to the nearest semitone or note in a selected scale. Again, a quantizer is yet another mode of the Expert Sleepers Disting (you can see why I included one in the rack for this course – I plan to eventually have six of them in my personal system!).
Getting Sound In and Out
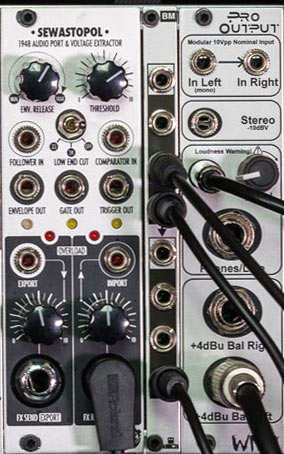
I also wanted to process external sounds such as drum loops through this modular system. For this, you need an input module that can amplify external signals to the level required inside a modular; it is also great if it has an envelope follower that can output a voltage that follows the loudness of the signal coming in. Envelope followers also usually have a gate extractor that outputs a trigger or gate signal when the envelope (loudness) level goes over a given threshold. Since the attacks of notes are often their loudest points, this means you get a note on gate signal at the start of a new sound or note routed into the input.
A nice bonus is when an external interface module also has its own output to interface to line-level signals. This means it can act as an effect loop, sending the modular signal out to an external guitar pedal or rack effect and getting it back into the modular for further processing. For this rack, I chose the Xaoc Devices Sewastopol, which supports both envelope following and effect loops with a lot of flexibility to dial in the response you want. Both uses are demonstrated in the Learn Modular Synthesis course.
Utility Modules
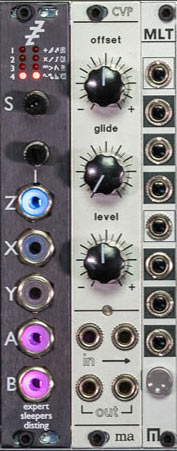
The most basic utility module you need is a multiple (“mult” for short). These take a signal and split it into multiple copies so that you can route it to more than one place – for example, to have a keyboard control voltage drive more than one oscillator, or to have an LFO modulate both an oscillator and a filter. I wrote an entire article on this subject, but in general modulation control voltages are usually fine with “passive” multiples that simply wire a bunch of jacks together; there are also splitter cables and other widgets that perform the same function. Voltages that control pitch are far more sensitive to being duplicated accurately, and often require “active” or “buffered” multiples. I have two buffered dual multiples in this system (an Intellijel and a Malekko): one that I used to split control voltages and gates, and another that I used to split audio signals between the output module, a software oscilloscope, and a tuner.
The opposite of a multiple or splitter is a mixer that combines signals together. The Roland modules that form the core of this system are actually unusual in that they have mixers built in; often you need a mixer to combine a pair of oscillators that will then be fed into a filter, et cetera. I went with a STG Soundlabs .MIX as it replicates the circuitry in the old modular Moog’s CP-3 oscillator mixer, which is known to have a particularly nice overdrive that adds fatness to sawtooth waves in particular. (I have a separate article and video that goes into the wonders of that mixer.)
Additionally, you also should have a control voltage processor that can attenuate, invert, and offset modulation voltages for different tasks (bonus points if it can amplify signals as well). I went with a Manhattan Analog CVP, which is another module that’s available as a kit. I also wrote an article on utility mixers that discusses mixers that have control voltage processing built in https://learningmodular.com/choosing-utility-mixers-for-your-modular/. The Expert Sleepers Disting also has a few voltage processing functions among its many modes of operation.
And finally, you’re going to need patch cables – a lot of them. Plan on at least one to two dozen starting out. The standard 3.5mm cables are coated in plastic; some are covered in braided nylon or cloth. I’ve recently settled on the Black Market Modular cables, as they use the slightly thicker 26 gauge wire many have standardized around while keeping slim plug ends. As hinted above, you might also consider getting a few “stackable” or “IV” cables that can act as passive splitters.
Case and Power Supply
There are numerous Eurorack module cases available – made from a variety of materials from plastic to metal to lovely exotic wood – as well as plans to build your own. As mentioned in the intro, I decided to go with a rack mount approach to avoid the expense of an actual “case.” This requires a pair of rails per row to mount the modules into, and end brackets to hold the rails the correct distance apart. It’s possible to get brackets that also include rack mount ears, or to bolt them on as an accessory. The rails either need to be pre-drilled at a spacing expected by Eurorack standard modules, or have a sliding nut holder system where you can move the nut to the position required by the screw going through the module’s face. I went with the Synthrotek system, as it’s good value; similar systems are available from others. End plates are often available to replace the rack ears, creating a desktop unit. These systems do leave the module circuit boards exposed; if that bothers you, then you should look at case-style solution.
I prototyped my system on ModularGrid.net before I started buying and installing real modules. One big advantage of this (beyond ModularGrid’s amazing database of modules) is that I got an estimate of how deep of a case I needed, and how much power my system would require. The rule of thumb is to take the estimate and add at least 25-30% on top of it so you have some “headroom” and don’t have issues with overheating or the power supply reference drooping, which can cause some modules to misbehave.
As you can see on ModularGrid, my selection of modules require about 850 mA of +12V supply, just under 600 mA of -12V, and 85 mA of +5V (that last one’s uncommon; not all modules require +5V, and not all power supplies deliver it). Adding 30% to those numbers yields 1040 mA, 754 mA, and 110.5 mA. That means a typical power supply that delivered only, say, 1 A of +12, 600 mA of -12, and/or no +5 wouldn’t cut it. Again, there are many solutions available; I ultimately went with the 4ms Row Power 40 which delivered roughly twice the power I needed, rather than just 30% extra – this would keep me out of trouble I swapped in some more power-hungry modules, or added another row.
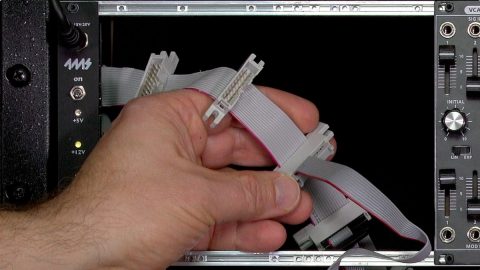
Before you commit to a bus board solution, make sure you count the actual number of modules you have, and make sure you have enough connections to host them. My rack for this course is packed with 18 modules in addition to the power supply connection; systems that only supply, say, 12 connections wouldn’t cut it.
Thousands of Dollars Later…
It’s usually surprising how fast the final price adds up when building a modular system. My particular system for the Learning Modular Synthesis course may be a bit pricey for those starting out, but again I wanted to make sure it was fully equipped so it could cover a wide range of techniques. The beauty of modular synthesis is you can build up a system over time, starting with a core such as the top row of this system and then adding alternative modules as interest and finances allow. There’s also a good market in used modules, so if you find you don’t like a module as much as you thought you would (or run out of room in your case), you can usually sell it for roughly 20% off the new price – not bad.
I hope sharing my own mental process when assembling the system for this course helps you focus your thoughts when you put together your own system. Please feel free to ask questions and share your own experiences in the Comments section below. During the winter of 2016/17, I will be starting a new course titled Expanding Your Modular Synth that will hopefully help you make decisions for next steps to take beyond your starter system.


How much was this setup in the end?
The modules + power supply add up to $4036 at full list price, according to ModularGrid (https://www.modulargrid.net/e/racks/view/197719). I bought some of the modules used; modular stores also tend to have discounts around major holidays. The Synthrotek 3U bracket kits are $30 each x 2 for this system; I later added threaded inserts ($24 total including shipping from Allied Electronics). Two Synthrotek Flying Bus cables at $26 finish it off.
Thanks very much for this article, it answered many of my questions before i asked them!
I had a small Buchla box in the early 70’s, then got to spend some time with a Moog modular at UCSD in the mid 70’s. Haven’t really had any modular experience since, but now with a pair of Mother-32’s in house i feel myself heading back that way (the Mothers could really use a pair of AJH contour generators & VCAs).
Some of the hints you gave us in the article (like use EGs & VCAs between the VCOs when doing AM or FM) make me think i’ll be taking your course soon!
Thanks again,
Thanks for the positive feedback! Given where you’re at, I think you’ll also enjoy the next course, “Expanding Your Modular Synth.” I’m starting with a Moog Mother-32 and some other core modules (including the Roland 530 dual VCA & 540 dual ADSR + LFO), and then trying out a new module each week as an addition to this system. I’m recording the first batch of movies over the next 2 months; look for it to be released early 2017.
Great post, Chris! I too am a fan of the Roland 500-series modules. The features are great, and the sound is pretty phenomenal, too.
Great post. I am going through many of these issues as well..
I’m looking for the case used in this where can this be bought? And what brand is it? Thanks!
It’s just a 6U desktop studio rack/furniture, normally made for FX and other rack-mount gear – I’ve had it for so long I forget what brand. I used the Syntrotek ears (spray painted black) and rails, and added threaded inserts.
What did you mean about East coast using FM in parallel and the other in series? can’t those techniques be done by both styles of synthesis?
I didn’t say East coast used FM in parallel (or at least I didn’t mean to); it uses oscillators in general in parallel – the output of often 2 or more VCOs mixed together (but otherwise no interaction aside from sharing the same pitch CV), in contrast to the common West coast technique of one modulating the next in line.